How to Do Interior Design Rendering: A Step-by-Step Tutorial for Beginners
Interior design rendering is creating realistic images or animations of an interior space using 3D software. It is a powerful tool for communicating your design vision to clients, contractors, and stakeholders. Interior design rendering can also help you test different design options, materials, lighting, and colors before making any physical changes.
In this tutorial, you will learn how to do interior design rendering from scratch, using some of the market's most popular 3D software and rendering engines. You will also learn tips and tricks to make your renders more realistic and appealing.
What You Need
To follow this tutorial, you will need:
- A computer with a good graphics card and enough RAM
- A 3D software of your choice, such as SketchUp, Blender, 3ds Max, or Cinema 4D
- A rendering engine of your choice, such as V-Ray, Lumion, Enscape, or Corona Renderer
- Basic knowledge of how to use your 3D software and rendering engine
- A reference image or a sketch of the interior space you want to render
Step 1: Create the 3D Model
The first step is to create a 3D model of your interior space using your 3D software. You can either model it from scratch or import an existing model from a file or an online library.
To model it from scratch, you will need to use the basic tools of your 3D software, such as drawing lines, shapes, extruding, scaling, rotating, and moving. You will also need to use layers, groups, and components to organize your Model and make it easier to edit later.
To import an existing model, you must find a suitable file format compatible with your 3D software, such as .skp, .obj, .fbx, or .dae. You can either download a model from an online library, such as 3D Warehouse or TurboSquid or use a model you have created or received from someone else.
Once you have imported or created your 3D Model, you must check for errors or issues, such as missing faces, reversed faces, overlapping geometry, or incorrect scale. You can use the tools and commands of your 3D software to fix these errors and optimize your Model for rendering.

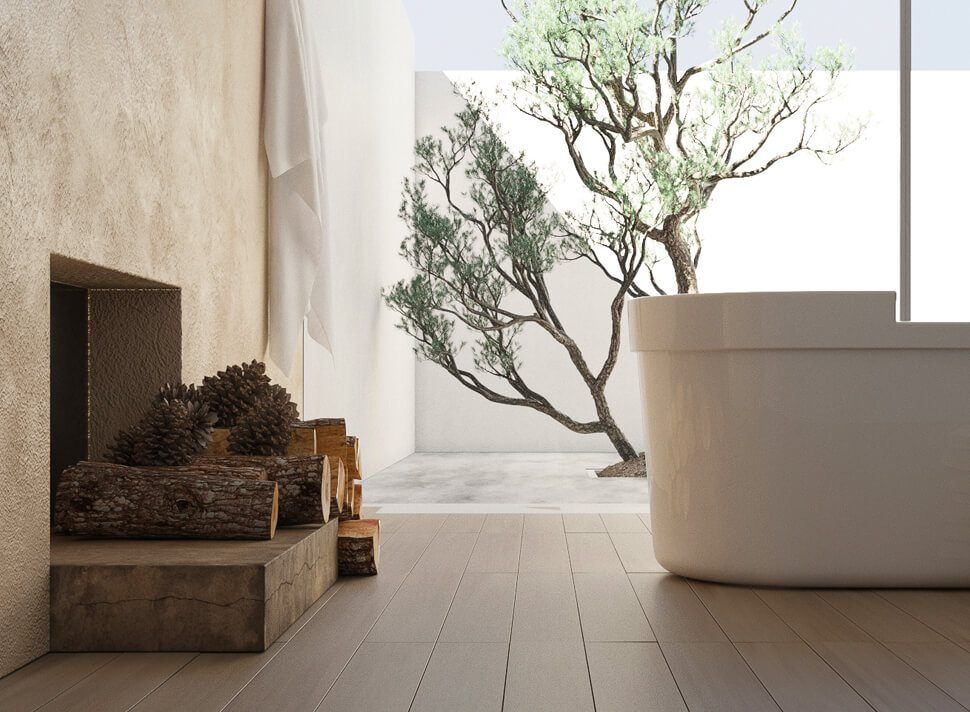
Image from Yousee Studio
Step 2: Add the Materials
The next step is to add the materials to your 3D Model using your rendering engine. Materials are the textures and colors that define the appearance of your surfaces, such as walls, floors, furniture, fabrics, etc.
To add materials to your 3D Model, you will need to use the material editor of your rendering engine, which allows you to create, edit, and apply materials to your objects. You can use the predefined materials with your rendering engine or create custom materials using images, colors, maps, and settings.
To create realistic materials, you will need to consider the following properties:
- Diffuse: The base color of your material
- Reflection: The amount and quality of light that is reflected by your material
- Refraction: The amount and quality of light that is transmitted through your material
- Bump: The illusion of depth and detail on your material
- Displacement: The actual displacement of geometry on your material
- Normal: The direction of the surface normals on your material
- Glossiness: The smoothness or roughness of your material
- Transparency: The opacity or transparency of your material
- Emission: The amount and color of light that is emitted by your material
You can adjust these properties using sliders, values, images, or maps in your material editor. You can also use different types of materials depending on the nature of your surface, such as standard materials for solid objects, glass materials for transparent objects, metal materials for reflective objects, etc.
Step 3: Add the Lighting
The third step is to add the lighting to your 3D Model using your rendering engine. Lighting is one of the most important aspects of interior design rendering, as it affects your scene's mood, atmosphere, and realism.
To add lighting to your 3D Model, you will need to use the lighting tools of your rendering engine, which allow you to create, edit, and place different types of lights in your scene. You can use natural lighting from the sun and the sky or artificial lighting from lamps, fixtures, or emissive materials.
To create realistic lighting, you will need to consider the following properties:
- Intensity: The brightness or darkness of your light
- Color: The hue or temperature of your light
- Size: The area or angle of your light
- Position: The location or direction of your light
- Type: The shape or behavior of your light, such as point lights, spotlights, area lights, etc.
- Shadows: The presence or absence of shadows cast by your light
Using sliders, values, images, or maps in your lighting tools, you can adjust these properties. You can also use different types of lighting depending on the effect you want to achieve, such as ambient lighting for general illumination, accent lighting for highlighting specific objects, or mood lighting for creating a certain atmosphere.

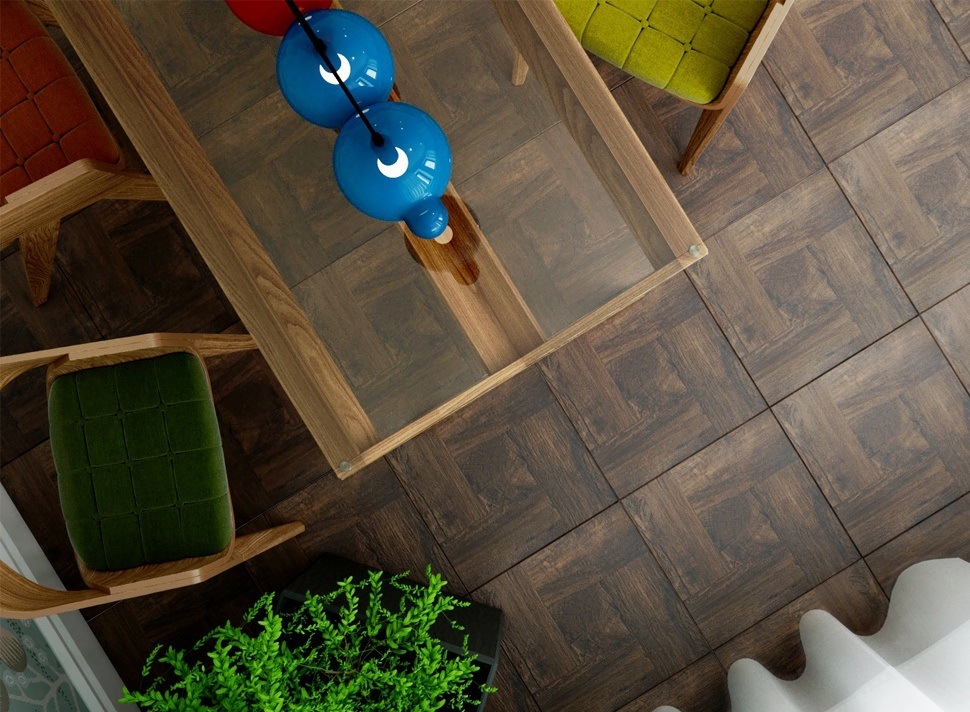
Image from Yousee Studio
Step 4: Add the Camera
The fourth step is to add the camera to your 3D Model using your 3D software. The camera is the point of view from which you will render your scene. It determines what you will see and how you will see it.
To add a camera to your 3D Model, you will need to use the camera tools of your 3D software, which allow you to create, edit, and position a camera in your scene. You can use the default camera with your 3D software or create your own custom camera using settings and parameters.
To create a realistic camera, you will need to consider the following properties:
- Focal length: The distance between the lens and the sensor of your camera
- Field of view: The angle or range of vision of your camera
- Aperture: The opening or closing of the lens of your camera
- Depth of field: The range of distance that is in focus in front of and behind your camera
- Exposure: The amount of light that reaches the sensor of your camera
- White balance: The color balance or correction of your camera
You can alter these attributes with sliders, numbers, visuals, or maps in your camera tools. You can also use different types of cameras depending on the style you want to achieve, such as perspective cameras for realistic views, orthographic cameras for schematic views, or panoramic cameras for wide-angle views.
Step 5: Render the Image
The final step is to render the image using your rendering engine. Rendering is converting your 3D Model into a 2D image or animation. It involves calculating the interaction of light, materials, and geometry in your scene.
To render the image using your rendering engine, you will need to use the render settings and options available in your rendering engine. These settings and options allow you to control the quality and speed of your rendering process. You can use your rendering engine's default settings and options or customize them according to your needs and preferences.
To render a realistic image, you will need to consider the following settings and options:
- Resolution: The size or pixel count of your image
- Format: The file type or extension of your image
- Sampling: The number or method of samples per pixel
- Denoising: The reduction or removal of noise or grain in your image
- Global illumination: The simulation or approximation of indirect light in your scene
- Render elements: The separate layers or channels of information in your image
You can adjust these settings and options using sliders, values, images, or maps in your render settings and options. Depending on the purpose and stage of your rendering process, you can also use different types of rendering modes, such as draft mode for quick previews, production mode for final outputs, or interactive mode for real-time feedback.

Conclusion
In this tutorial, you have learned how to do interior design rendering from scratch using some of the market's most popular 3D software and rendering engines. You have also learned some tips and tricks to make your renders more realistic and appealing.
Interior design rendering is a fun and rewarding skill that can help you showcase your design ideas and impress your clients. You can create stunning interior renders that reflect your style and vision with practice and experimentation.
We hope you enjoyed this tutorial and found it useful. If you have any questions or feedback, please contact us. Happy rendering!
Karen Spacey is a content writer and the author of this article.
RELATED ARTICLES
learn more