It was a hot day in September when Cohen Development Group asked us to create a high-quality visualization of a private house. (Spoiler: our team later complied with this request).
About The object
For the customer, we performed three services: 3D Exterior rendering, 3D Interior Rendering, 3D Floor Plan. The customer was very particular about the details of his home. He wanted everything to be perfect, from the layout of the rooms to the color of the walls.
The project's motto was photorealism, photorealism, and, once again, photorealism. So when it came time to create a visualization of this house, we knew we had to make sure every detail was just right. All we had in the beginning were a few CAD files. These were precisely the drawings, not the finished model - we had to make it ourselves.
Source Files:
 |
 |
Environment
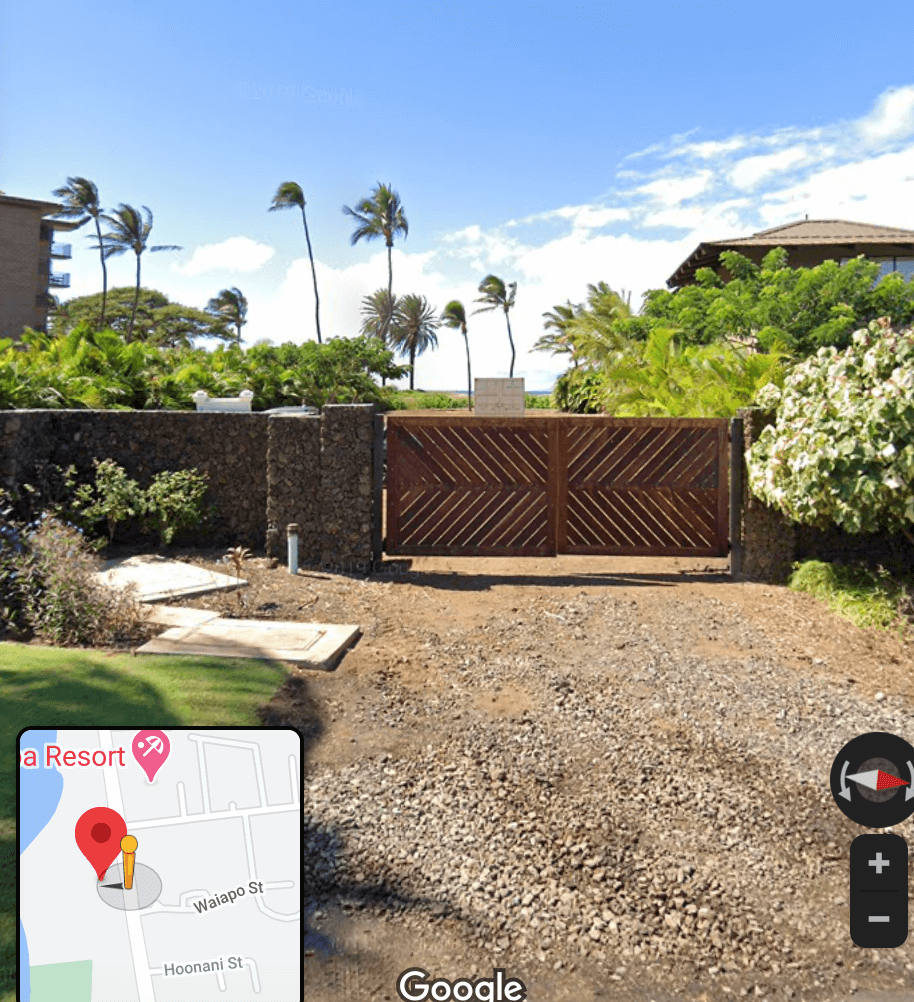
The location we got was just fantastic. Our task was to highlight the natural magic of this place and show all its potential for living with taste. Palm trees, lots of sun and light, ocean view... Hawaii — what else can we say?
Source files for the environment:
 |
 |
Process of creation
Step 1: Exterior in White
After we decided on the general concept, it was possible to proceed to the next stage. Our first step here was to create the clay models of the buildings.
 |
 |
Step 2: Adding Details and Lighting, First Draft
Once we were happy with the models, it was time to start detailing. We added in all the extra touches that would make them really stand out. Armed with our imagination and sense of style, we began to think about the environment and add materials to the clay models. Our task was to create two mega-extra-solar models and two models of a building in the rays of a soft sunset.
Our customer chose Ipe siding for finishing the facades, and we set to work. Further work with the customer traditionally took place in several stages: we successively sent renders, received feedback, and made changes if necessary.
This is what the first version of exterior looked like:
 |
 |
 |
After the exteriors, we moved on to the interiors.
To work on the interiors, the customer provided us with several references:
 |
 |
 |
 |
 |
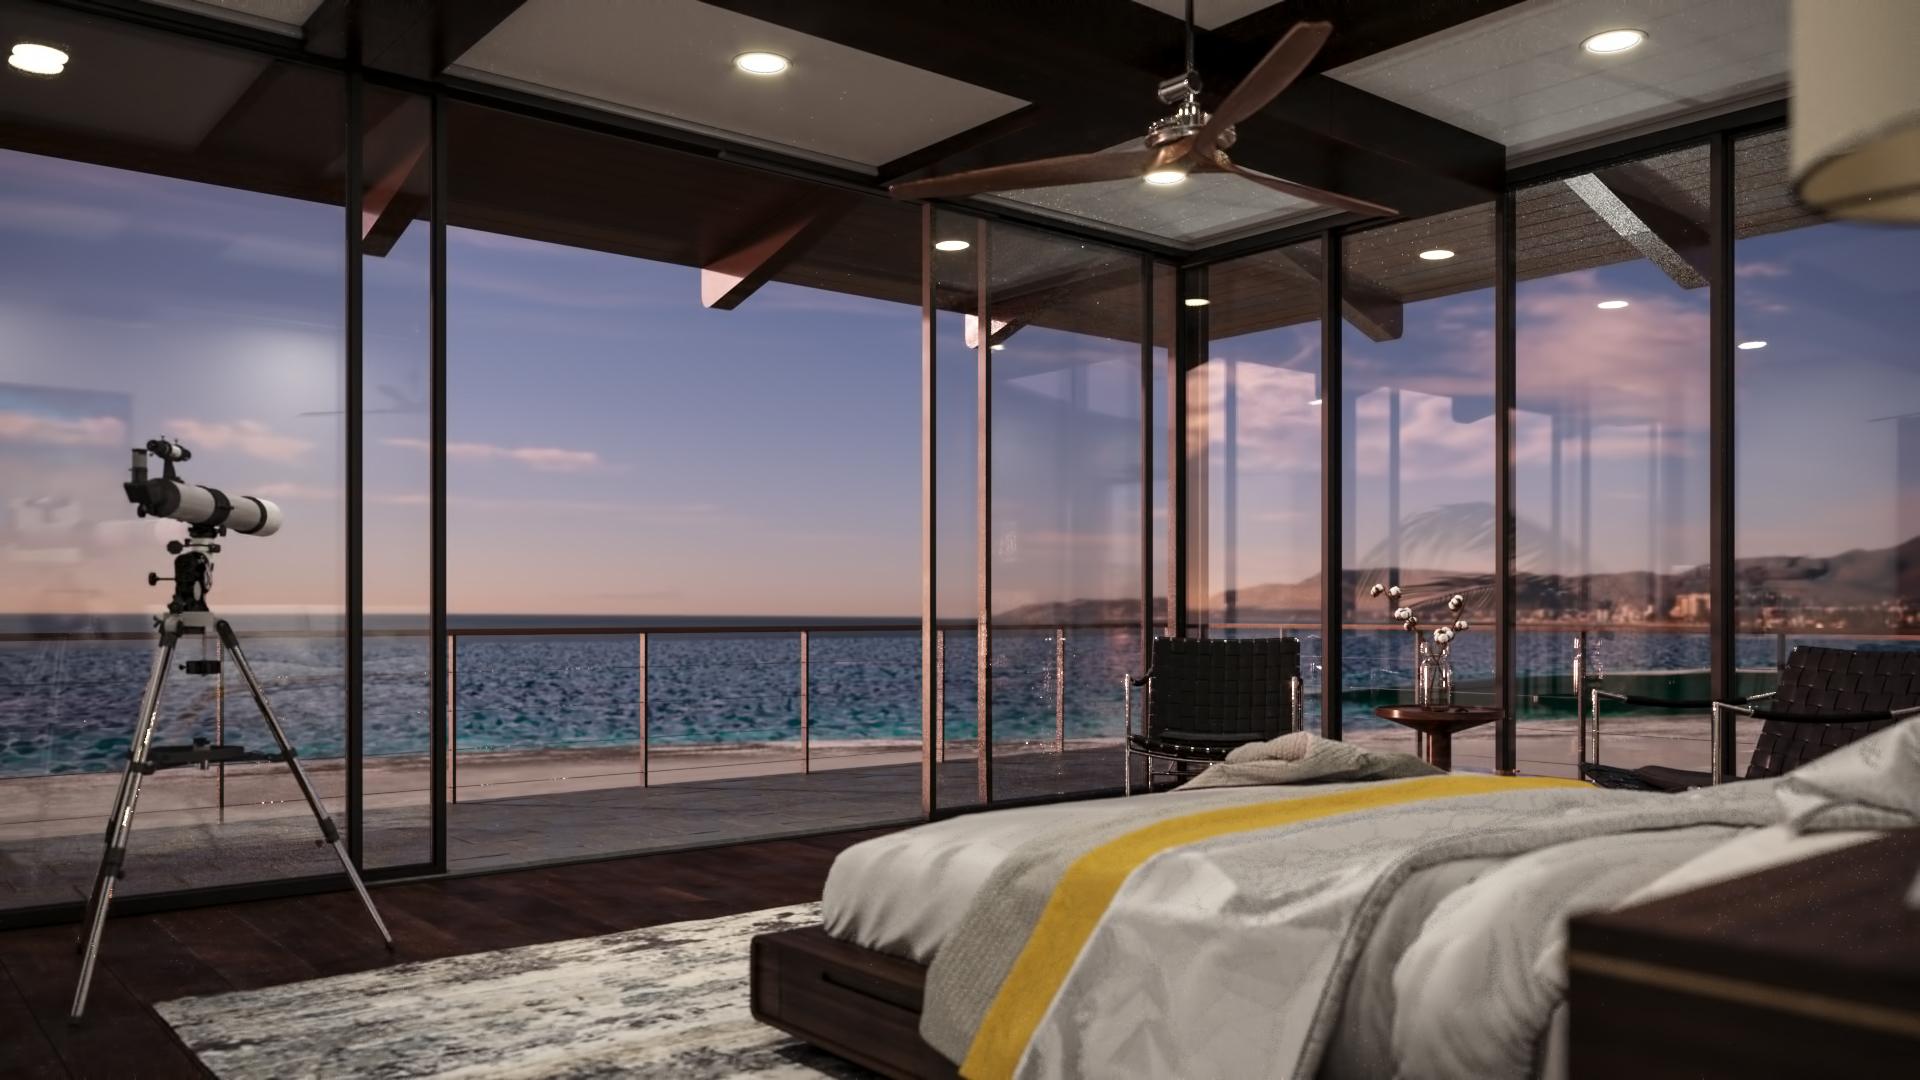
In the bedroom with panoramic windows, we could not help but add a telescope: Hawaii has such an incredible starry sky!..
This is what our first pictures for the bedroom looked like:
 |
 |
 |
 |
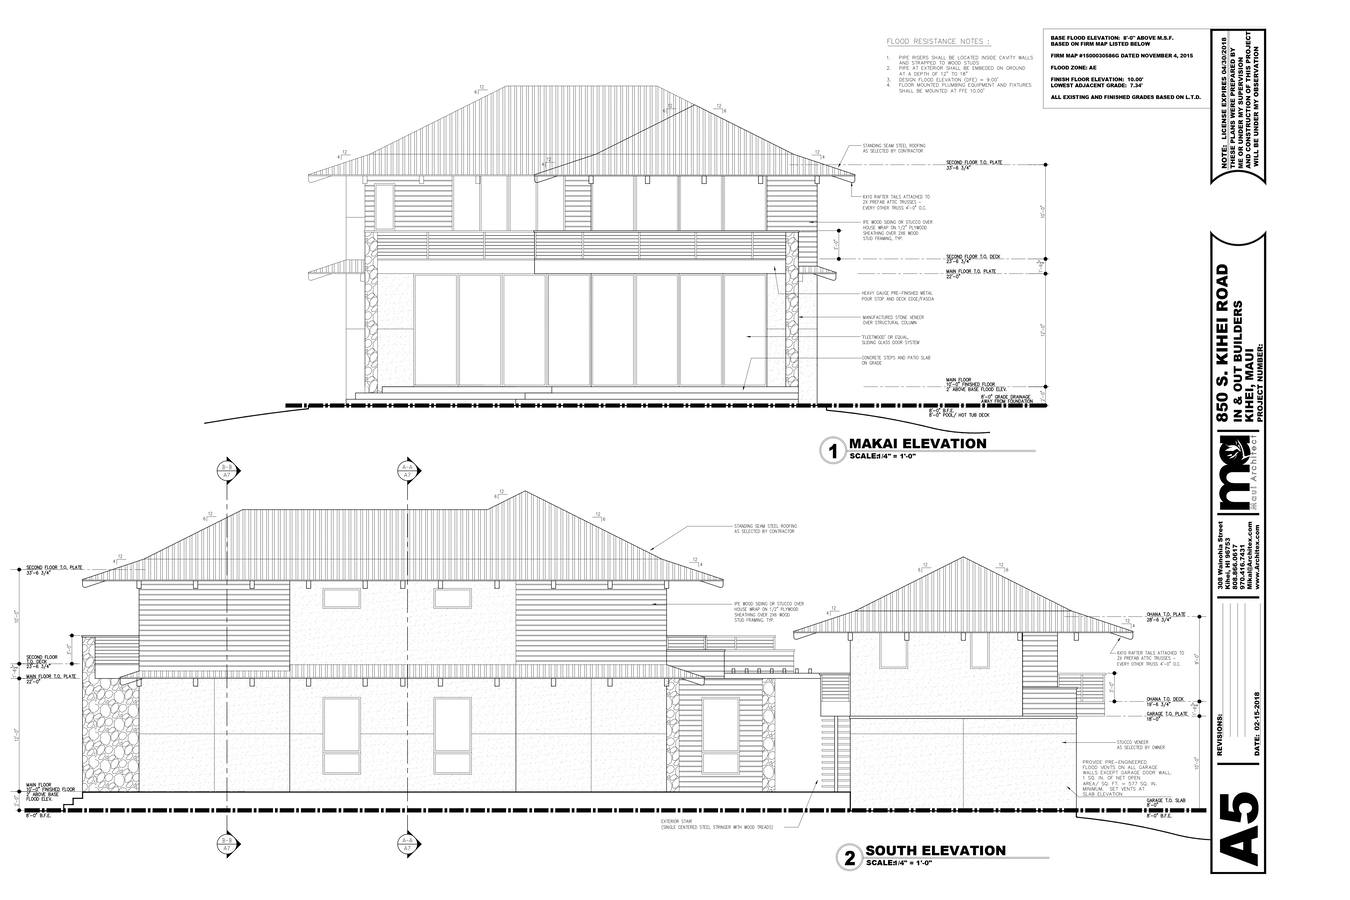
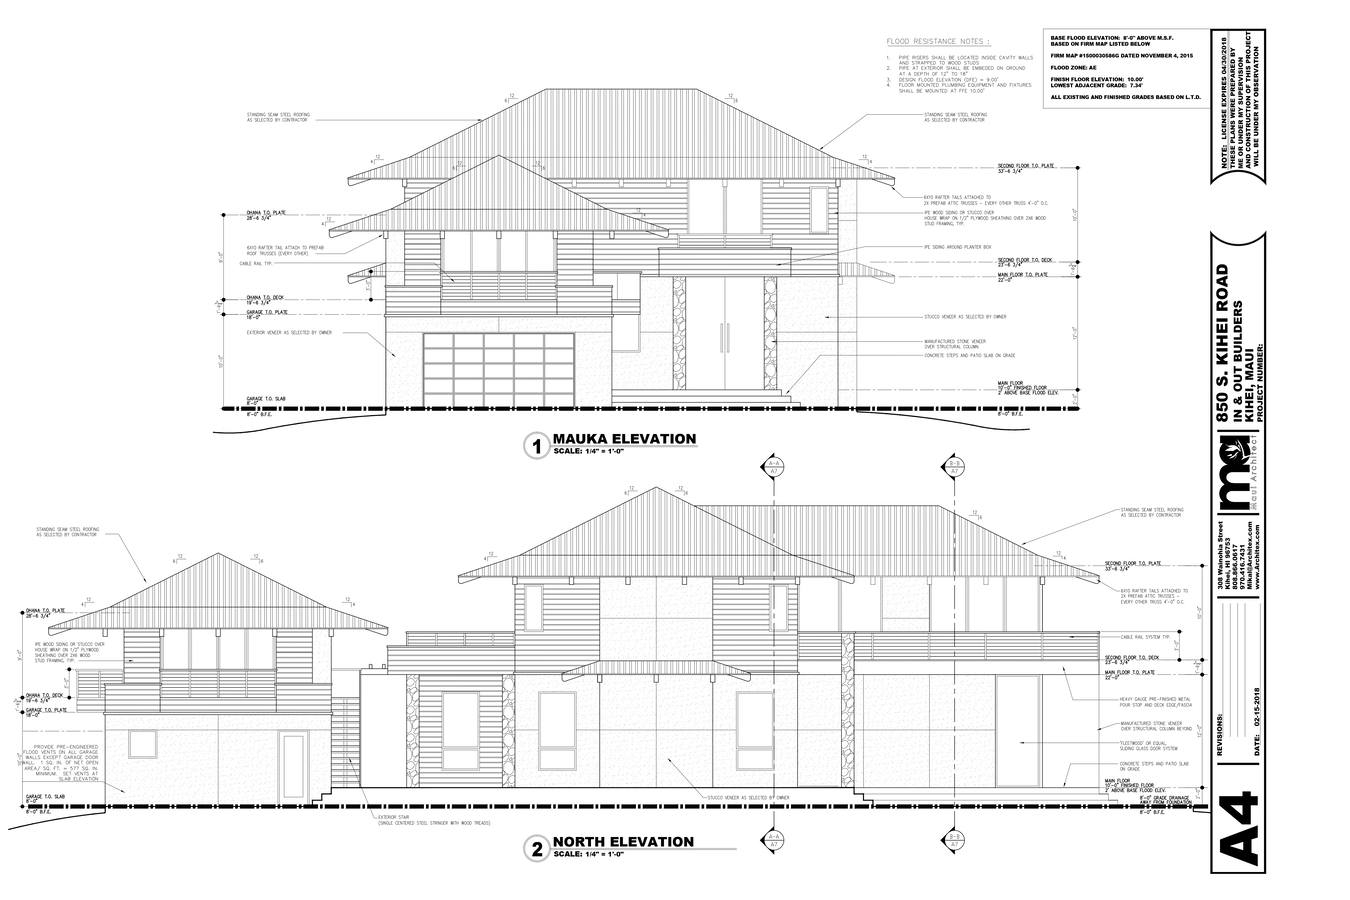
And this was the first version of floorplans:
 |
 |
Step 3: Next Drafts
In response to the first draft, the customer sent us several comments. For example, in this room, we were asked to lighten the color of the floor, edit the windows themselves and the view from them, remove the flower from the wall, add a wall lamp to it, and make several other adjustments.

The clients also asked us to make several changes to the bedroom image. We had to change the color of the beams and the floor, remove the windows and make a picture of a sunny day.
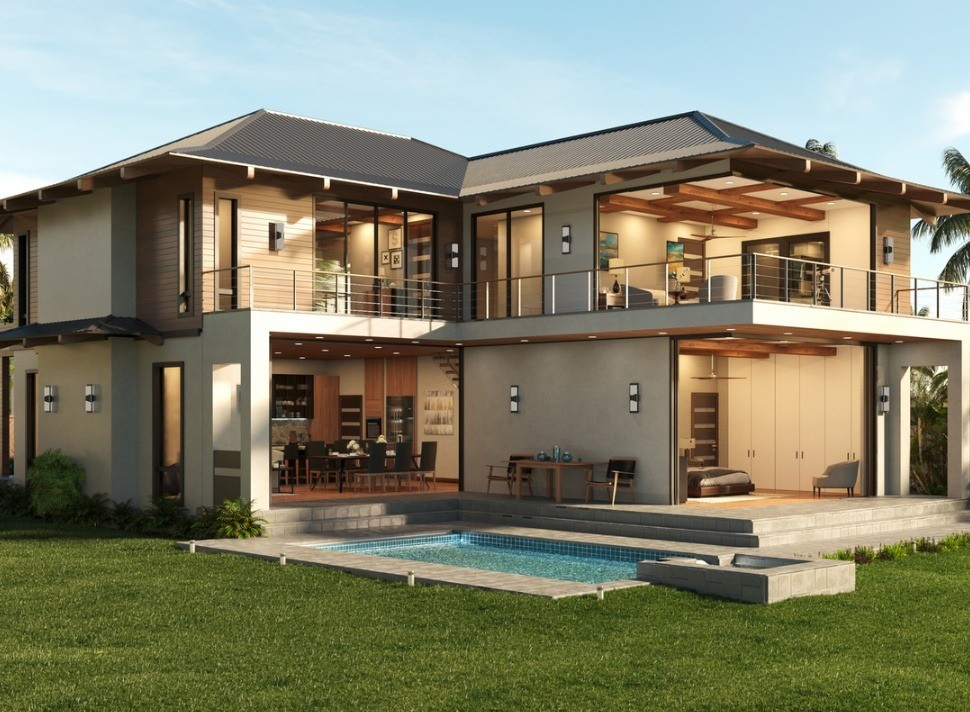
Having received the customer's comments, we made several changes to the project: we made the floor lighter, finalized the windows, changed the lighting. At the same time, we adhered to warm colors: yellow, orange, honey, mustard tones. This is what the exterior looked like after the edits:
 |
 |
 |
 |
And here is the updated interior:
 |
 |
 |
 |
In response to these pictures, we received several comments: to make the kitchen's interior less shiny, to make the main door of the kitchen the same color as the room, in the interior of the room overlooking the ocean, to make the ceiling less glossy.
 |
 |
As for the exteriors, we were asked to remove the mural from the wall and turn the night view into a day view.
 |
 |
 |
New version of floorplans:
 |
 |
Step 4: Final Images
For the previous round of edits, we received several comments from our customer:
1. Change the ocean view in the back to lawn and then ocean. You can't see the island from that angle.
2. Remove the house in the back left corner and replace with Eureka palms in front of the wall. Rock wall on left should also have Eureka palms in front of it. Enough that you can't even see the wall.
3. Rock wall on the left should again have enough Eureka palms in front of it that you can't even see the wall.
4. The darker cabinet above the sink is supposed to be a glass front. The couch looks a little messy. Could we get the cushions to be a bit more structured (Like in the attached photo) and can we change the blanket to dark blue or make some of the pillows dark blue. We need a little pop of color :)
Attached photo:

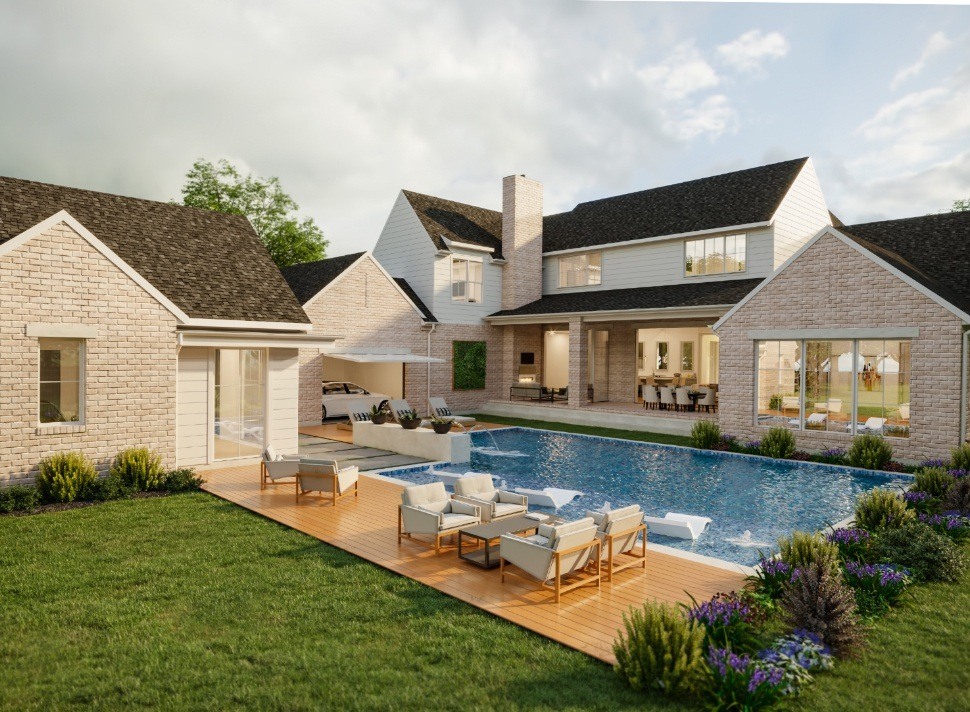
This is how the final exterior looked after making all the changes:
 |
 |
 |
 |
...And this was the final version of the interiors:
 |
 |
 |
What a view!

And here is what the final version of the floor plans looks like:
 |
 |
 |
Our team worked tirelessly, creating different versions of the house until they finally found one that met all customer's expectations.
We were all very excited to see the final product and when we delivered it to Cohen Development Group, they were thrilled. It looked like a real house, right down to the last detail.