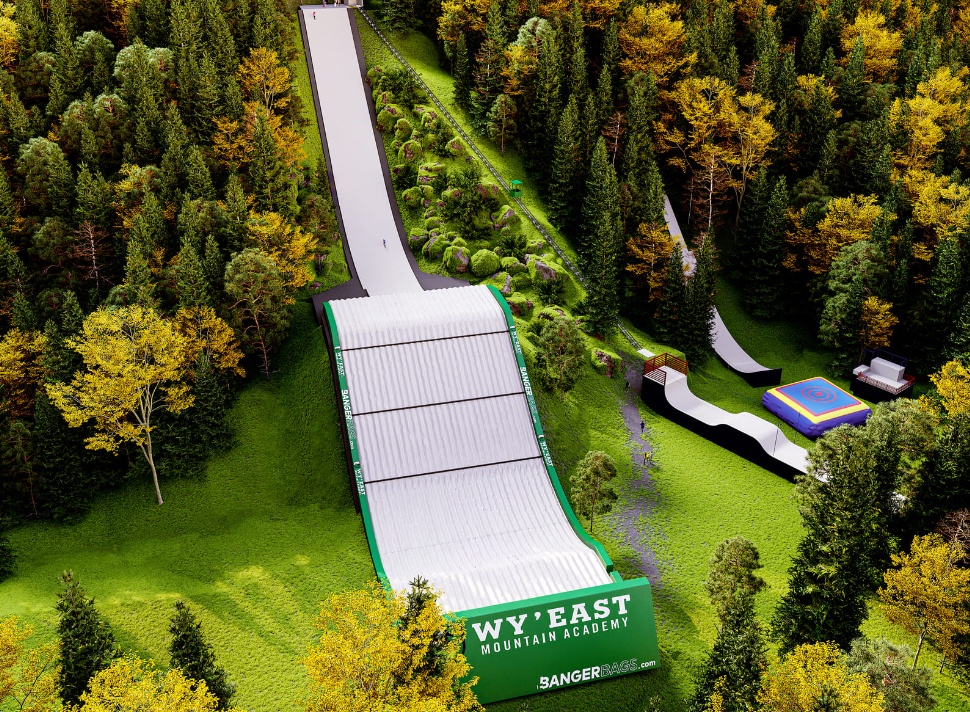
We are already used to being approached for 3D renderings of houses. But sometimes custom projects happen, like this epic ski jump.
We especially love such non-standard tasks because they allow our team to fully express their creative potential, look at the standard work routine from a new angle, and gain new knowledge during work. It is these challenges that help us grow and improve ourselves.
Phase #1. Digging Into the Project
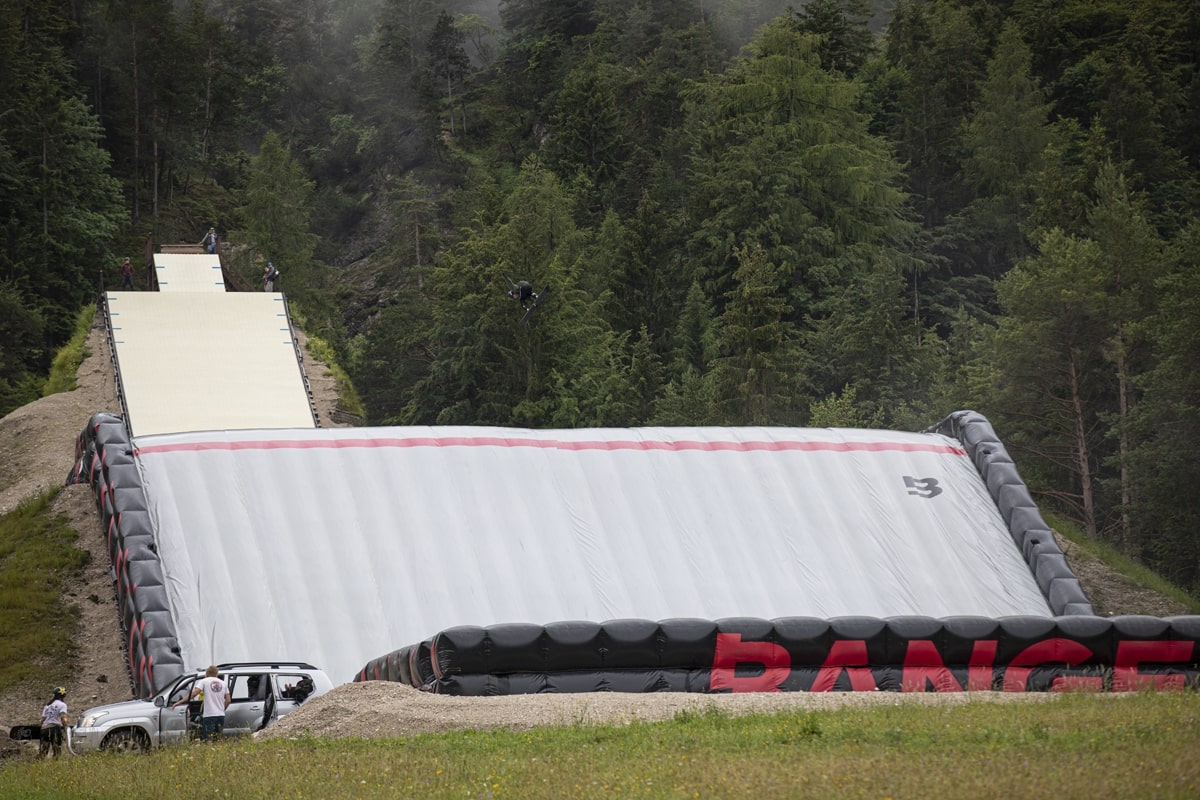
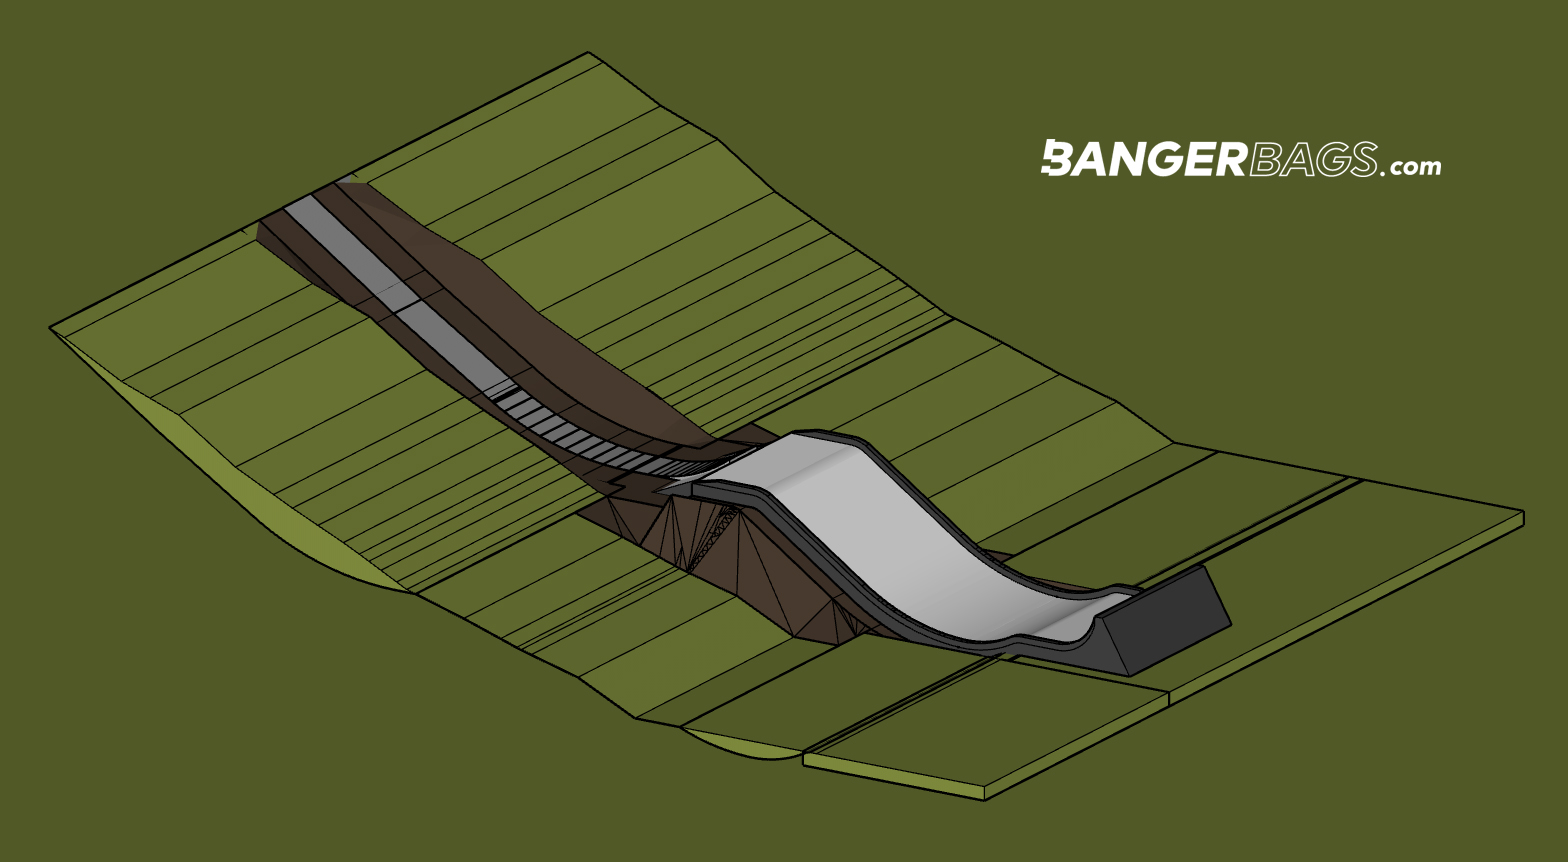
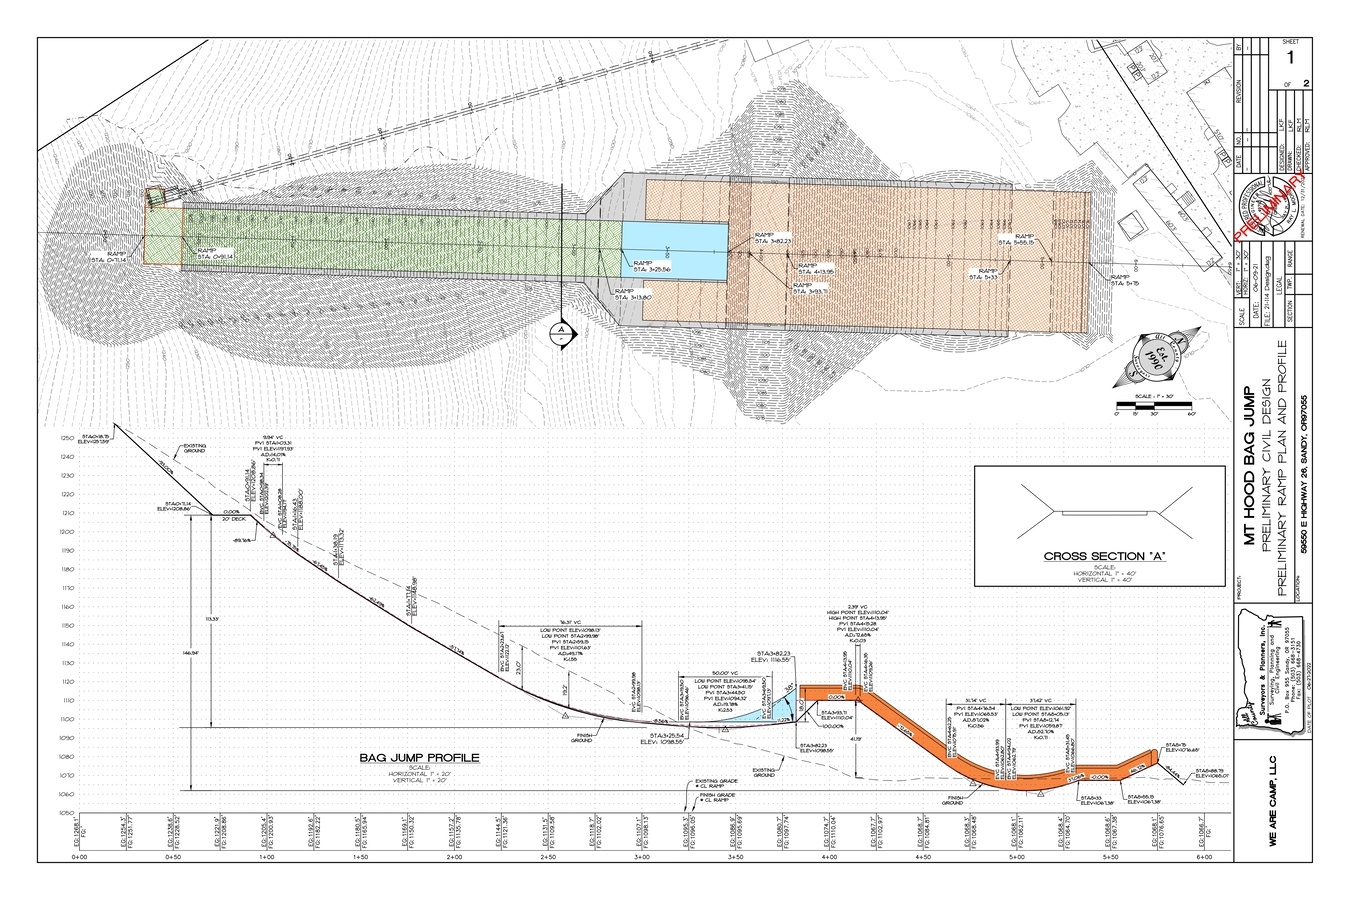
Usually, work on any project begins with the study of materials provided by the client; this project is no exception. The only thing that differs every time is what kind of materials the client shared with us. Materials on the Ski Jump included topographical views, links to the materials used to construct the jump, location photos, and diagrams of the jump and lift. We carefully examined these materials to ensure we clearly understood the project's scope and all relevant details.
 |
 |
 |
 |
Phase #2. First Draft
With the information provided by the client, we began working on the first draft of the 3D visualization. We created an exterior 3D render of the ski jump from a frontal view and sent it to the client for review.

Phase #3. Feedback From the Client
Upon receiving the first draft, the client provided feedback requesting a few changes. They loved the initial design but wanted us to remove some trees between the lift and the jump and make a few other minor tweaks.
Here is the feedback the customer gave us:
Excellent! Looks great!
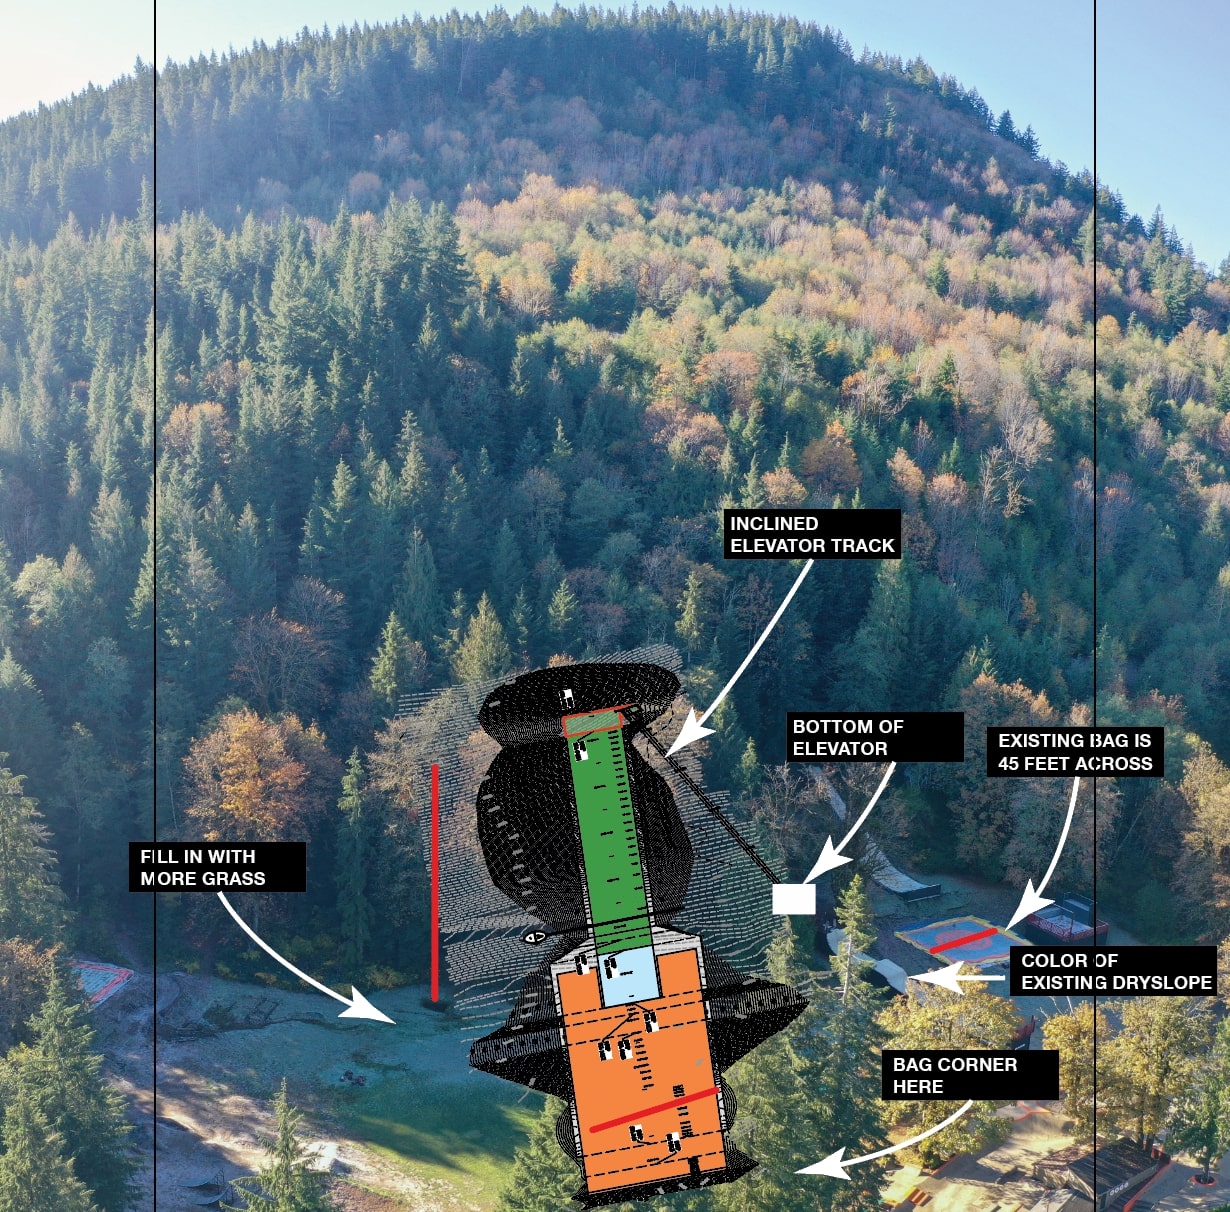
Please remove the trees between the elevator and the bag. Do low lying bushes that look like the “cascades” in Oregon.
I know this is rough but I’ll give you some other notes anyway:
- Include an elevator trolly. I think I showed you an example in the materials I sent. Please color it the same green as the airbag (main color) with black as the accent).
- Color the flat grass a nice rich green like a futbol pitch.
- Add the square airbag in over by the trampoline and existing jump.
- Add a dark asphalt trail between lookers right, bottom of bag and the bottom terminal of the inclined elevator (see screenshot below). Can you show a skier and a snowboarder walking on the path?
- Add a dark asphalt trail between lookers right, bottom of bag and the bottom terminal of the inclined elevator (see screenshot below). Can you show a skier and a snowboarder walking on the path?

Phase #4. Second Draft
Based on the feedback provided, we made the necessary adjustments and created a second draft of the 3D visualization. Again, as usual, we sent this draft to the client for review.
Phase #5. More Feedback From the Client
After receiving the second draft, the client provided some additional feedback requesting a few more minor adjustments:
Notes referencing the screenshot notes below:
- Fill in the grass (it looks too sparse like the grass isn’t growing);
- Add a dark asphalt trail between lookers right, bottom of bag and the bottom terminal of the inclined elevator.
Those are the only changes.

We made these changes and sent the final render for their approval.
Phase #6. Final Approval
The clients approved the final render immediately and were thrilled with the result. They complimented our team on the quality of work and speed of delivery.
Here is the result of this unusual and fascinating project:

Conclusion
In conclusion, creating a 3D visualization of a Ski Jump in Oregon required us to work closely with the client, analyze their materials, and create multiple drafts until we arrived at the final render. At YouSee, we take pride in our attention to detail and ability to create stunning visualizations that exceed our client's expectations.